3D texturing
To do this, various software packages and/or techniques can be used. Hand-painting the textures or even using real photographs to create a detailed or realistic appearance is among the options by which a texture artist can add texture to a model.
In this article, we’re going to take a look at the texturing process as a part of the production stage.
Before you head over to our blog, check out the following video from one of our recent 3D animation projects. It’s a start to finish process of how we made our main character (Pablo) come to life by using different texturing techniques.
What is texturing in 3D animation?
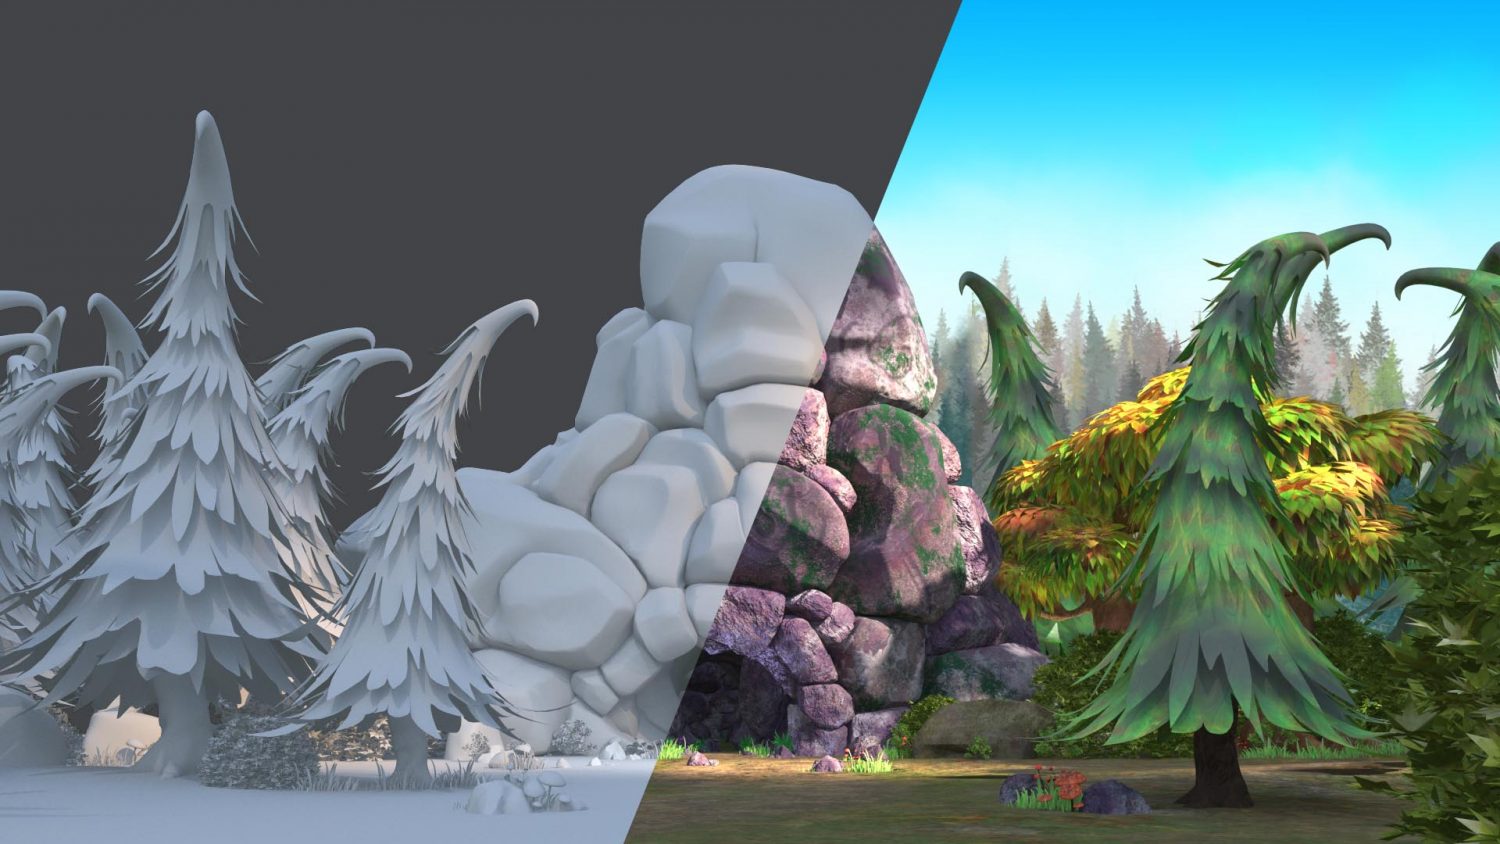
Objects created in the 3D modeling component of the 3D pipeline are usually in a program’s default flat gray color. 3D texturing is in fact the art of clothing the 3D models with 2D images. Texture artists are responsible for applying color and surface attributes to 3D objects. The general objective is to make the model’s surface match its concept art design or real-world counterpart.
For instance, if the model is supposed to represent a brick wall, the task of the texture artist would be making sure the 3D brick wall shares the same color and surface properties of a real-world brick wall when rendered. The same example can be made with a wooden table or a shiny glass window.
What are some common 3D texturing techniques?
Generally, 3D texturing is supposed to portray three main properties of every surface in a 3D environment:
- Material
Texture, to a huge extent, can give the viewer a sense of material about an object in a 3D world. 3D texturing’s primary objective is to show the viewers a sense of what the object is actually made of by looking at it.
- Light effects
In the real world, every object portrays unique properties when exposed to light; such as reflection, refraction, anisotropy, and so on. The same properties must be applied to 3D objects of the same material in a 3D animated world.
- Tertiary details
If every single detail on the surface of a 3D object were to be created in the 3D modeling phase, processing the objects would be a real burden for both 3D software and of course the 3D artist. 3D texturing provides a solution for this problem: It allows us to create small details such as wrinkles, scars, cracks, bumps, etc. on the surface of the models without imposing much pressure on hardware or software. Different types of textures and texture mapping can be used to make a 3D model look more realistic in a 3D environment.
3D texturing workflow breakdown; 3D step process
Every animation studio or 3D artist can adopt a slightly different workflow to reach the same results. Here in Dream Farm Animation Studios, the 3D texturing workflow is usually as follows:
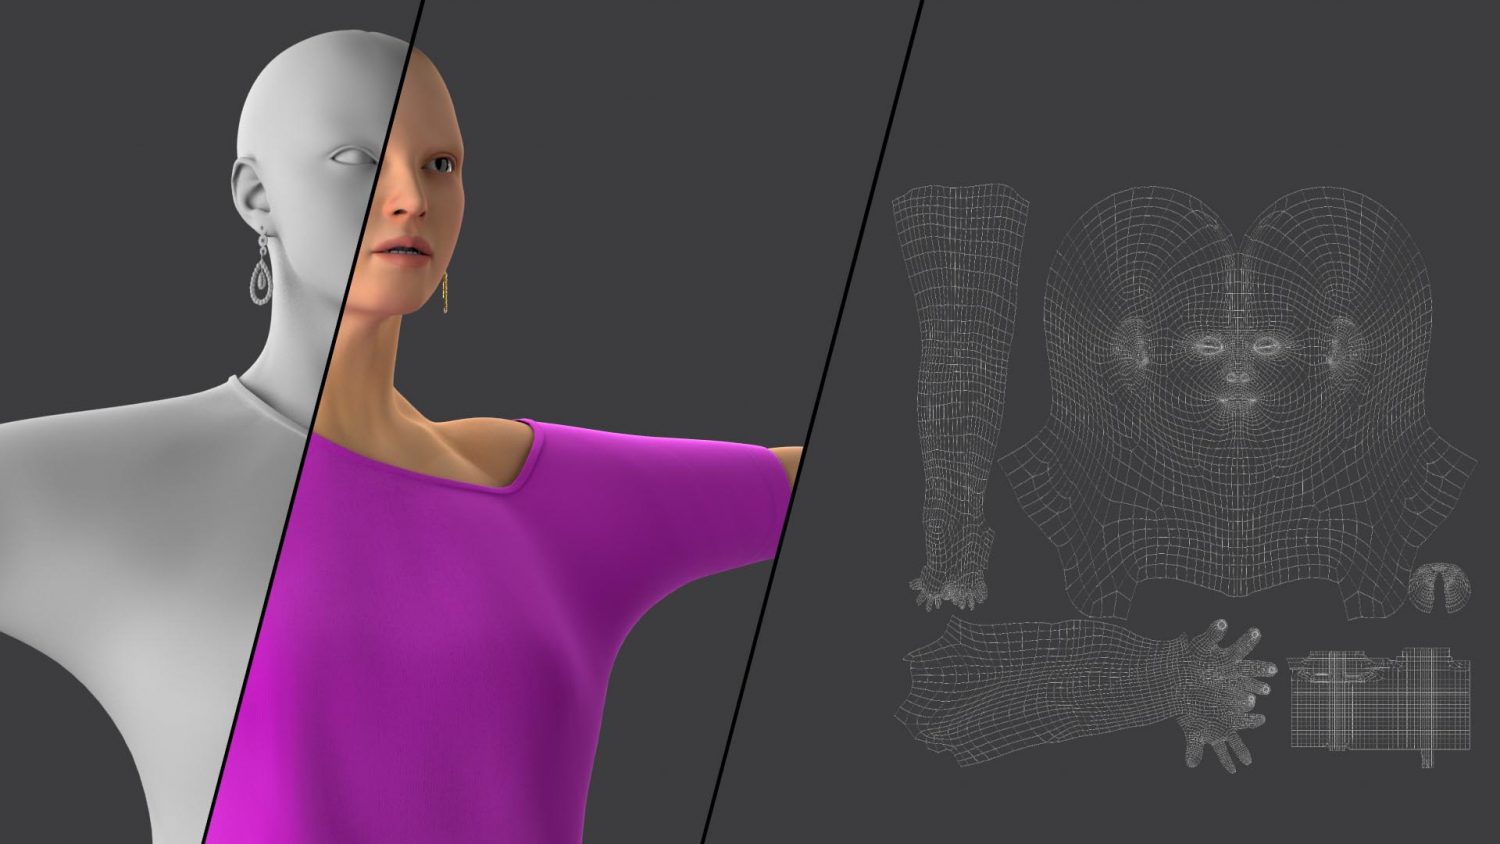
1. Unwrapping
To start the 3D texturing process, you need to unwrap the model first; which basically means unfolding a 3D mesh. Texture artists will create a UV map for each 3D object as soon as they receive the final models from the 3D modeling department. SUVs are in fact 2D representations of 3D models. UV mapping will help wrap a 2D image (texture) around a 3D object by directly relating it to vertices on a polygon. The resulting map will be directly used in the process of texturing and shading.
Besides exclusive applications, most 3D software packages such as Autodesk Maya provide a few tools or techniques to unwrap 3D models. Choosing the right tool to create UV maps is a matter of preference or compatibility.
Unwrapping a 3D model in the texturing component is most often a must; unless you want to use other options such as procedural textures. These are 2D or 3D textures created using a mathematical algorithm (procedure) rather than directly stored data.
Most unwrapping is done manually in Dream Farm Studios; especially for characters. Manual unwrapping methods might take a little bit longer, but make the painting process much easier. Automatic methods are also available and can be useful for less important objects like background props.
2. Texture painting and shading
Correct display of an objects’ overall look and its interaction with light is a key step towards its believability and appeal. The wrong material or surface properties can end up being rejected by the viewer’s mind. This sums up the overall purpose of the texturing and shading process, going hand-in-hand. The texture is usually a 2D image and shading is a group of functions that determines the way light affects the 2D image.
The process of defining color information, surface details, and visual properties of a 3D model is called “texture mapping”. Texture maps most used by Dream Farm texture artists include a Base Color map, Normal map, Height amp, Diffuse map, Specular map, Roughness map, and Self-Illumination map. There are tons of other texture maps as well, including Ambient occlusion map, Displacement map Specularity/reflection map, Roughness/glossiness map, Metalness map, Refraction map, etc.
3. Lighting & Rendering
In short, the process of calculating the different maps assigned to the object’s shader and also the lights is called rendering. Generally speaking, texturing, 3D lighting, and rendering processes relatively rely on each other. So it is important to choose your texture maps based on the preferences of the render engine you’ll be using at the end of the production stage.
4. Texture mapping
As Wikipedia puts it: “Texture mapping is a method for defining high-frequency detail, surface texture, or color information on a computer-generated graphic or 3D model. The original technique was pioneered by Edwin Catmull in 1974.”
Everything you should know about 3D texturing software
The first question that comes to mind is which software is the best for texturing works in animation. While there is some software that does some things better than others, there’s not a single software that does everything flawlessly. If you want to choose appropriate software, then you should answer some questions:
- What is the scope of my project? Am I doing it just to get the hang of texturing or not? If so, then you should start with beginner-friendly software that makes learning fun and easy like Blender.
2. What features do I need to do 3D texturing my project? You should see which one of the software has all the things you need like Zbrush.
Latest Trends in 3D Texturing for 2024
As of 2024, the 3D texturing landscape in animation production has seen significant advancements. AI-powered texture generation is now a game-changer, allowing artists to create highly detailed and realistic textures faster than ever before. Additionally, real-time ray tracing has become more accessible, enhancing the fidelity of textures with dynamic lighting and reflections. Sustainable texturing practices are also on the rise, with tools and workflows being optimized for lower computational resources, aligning with the industry’s growing focus on environmental sustainability.
Want to become a texturing artist? A little bit of sound advice
You can choose from different paths to becoming a professional texture artist; you can start apprenticeships in a well-known animation studio (they usually have summer jobs) or go for an entry job in a startup. Anyhow, keep in mind that employers usually favor texture artists that have a minimum of 2d years of professional experience in production. Plus, it can make you more standout if you have an academic degree or a bachelor of fine arts.
You might not be able to find a vacancy specifically for a texture artist, however, it’s possible to start as a 2d artist and build your way up from there. As with most jobs, the best thing is to gain some solid experience and create a portfolio to showcase your work.
Conclusion
Final 3D models are usually in a default flat gray color. Adding colors or surface and material properties to a 3D model requires another step forward in the 3D animation pipeline: 3D texturing. There are generally 3 main properties we intend to display in a 3D model by texturing: material, light effects, and some surface details.
3D Texturing is basically wrapping a 2D image around a 3D object and defining how light would affect it. Various software packages have different tools and techniques for adding texture to a 3D model. The texturing stage of the 3D animation pipeline includes unwrapping, texture painting & shading, and rendering. Textured models will be used in the rendering phase of the 3D animation.
Arash Naghdi
Arash is the equivalent of Buzz in Toy Story when he goes to infinity and beyond, but never comes back! responsible for our blog and content marketing efforts, he always delights the audience with his tenacity and passion in creating the extraordinary.
Payam Adib
Creating "something" out of "nothing" is the greatest joy for Payam. He believes content creation is the offspring of his innate characteristics including his never-ending thirst for painting, poetry, photography, music, and writing.
Great workflow and helpfull
Thank you Abdelrahem
Amazing article about the introduction, terms and steps for making 3D texturing in Animation. Very informative details and helpful especially for 3D and 2D Artists.
I’m so glad to hear that Chris!
Lovely explanation… Thanks
I’m glad you liked it Mike!
thank you .. you made me understand it in an easy way and it helped me to finish my assignments too……thanks soo much..
I really like the video, it clearly demonstrates the key steps of character creation especially 3d texturing.
Thank you, we are so much to hear that.
I don’t know how to choose the best software for texturing in animation as there are many on the market.
Thank you very much Shlansly, really appreciate your comment. You can check out our other articles about the animation pipeline too.
As an addition to this great article, I would say the salary of a texture artist is roughly around ranges from USD $47,000 to USD $96,000. I think it would help for those who want to apply for a texturing focus job.
Thank you very much, Ariel, it was a super useful addition.
I really found the article useful and used it for starting my texturing career. thank you
Thrilled to hear that. Thanks, Jexia
I’ll be starting a new job in a month in the HR role at a major animation studio in Vancouver. These workflow articles really helped a layman like me understand the duties of each role in the animation pipeline!
That’s great news, glad we could help 🙂